
Body-Worn Cameras — BWC Management
FortressDMS Body-Worn Camera management gives administrators complete control over your agency’s BWC program from a single module. Assign cameras to officers, enforce activation policies, review footage linked directly to incident reports, and generate evidence packages that satisfy chain-of-custody requirements — all without leaving the system your staff uses every day. Reduce policy violations and ensure critical interactions are always documented.
Camera Assignment
Assign specific camera units to officers at shift start, automatically logging who carried which device during each shift.
Footage Review
Watch synchronized video clips within FortressDMS alongside the corresponding incident report, booking record, or use-of-force log.
Evidence Chain of Custody
Every footage access, export, and share event is immutably logged to support prosecutorial and internal affairs requirements.
Policy Compliance Tracking
Automatically flag shifts where a camera was not activated during a qualifying event and route alerts to supervisors for review.
Retention Management
Set retention schedules by event type — litigation holds automatically prevent deletion of footage tied to open cases.
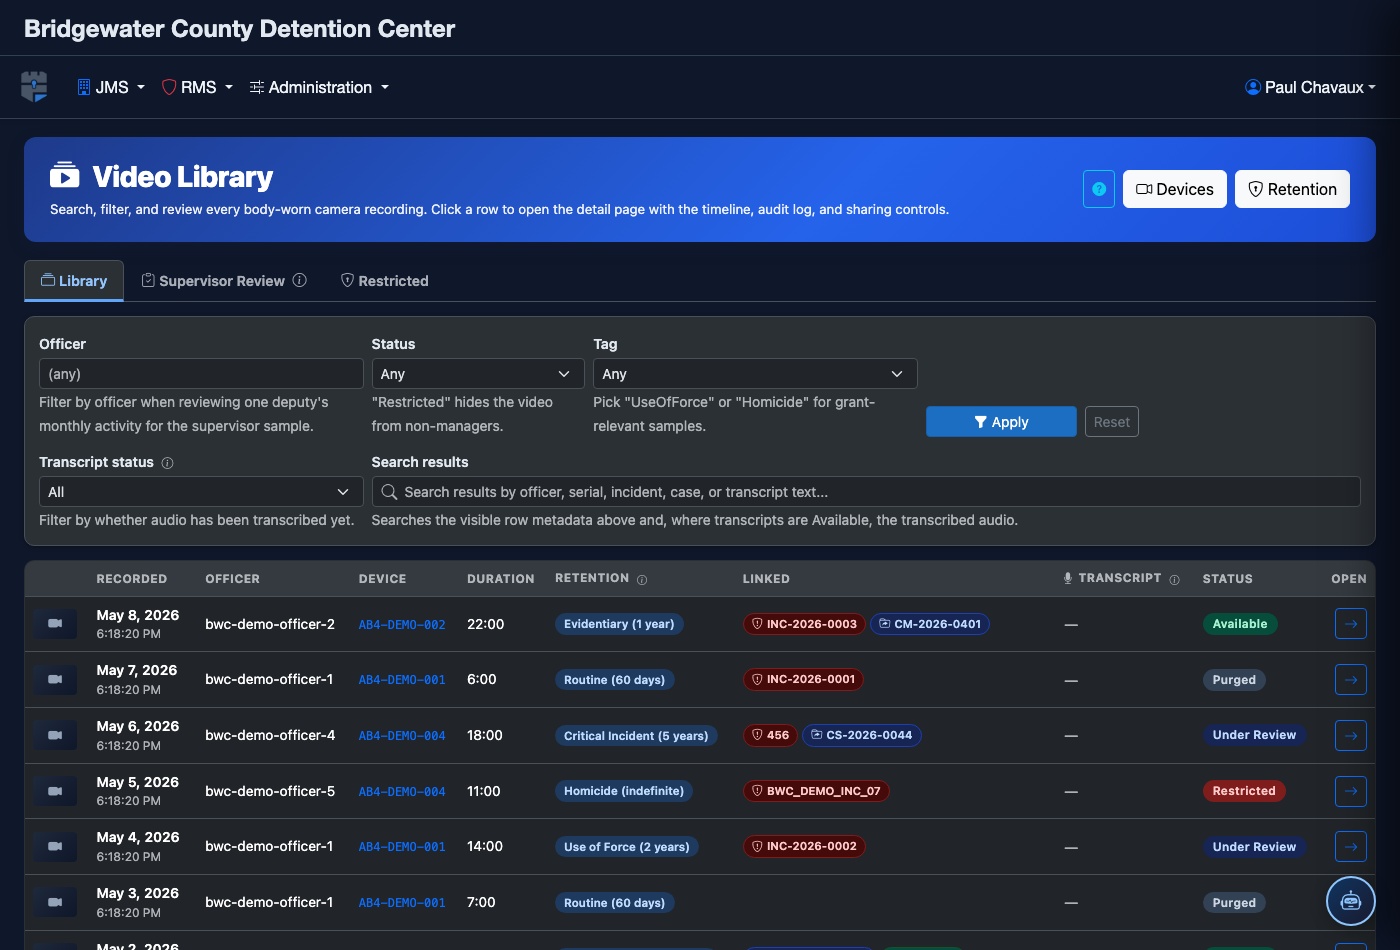
Step-by-Step: Managing Body-Worn Cameras
Open the BWC Module
Navigate to Body-Worn Cameras in the main menu. The overview panel shows the status of every registered camera unit: Available, Assigned, Docked/Charging, or Needs Service. Battery level and last-sync time are displayed for each device.
Register a New Camera
Click Add Camera and scan or type the camera’s serial number. Enter the manufacturer, model, purchase date, and assigned storage quota. The device will appear as Available once registered and synced to the dock.
Assign Camera to an Officer
Click the camera unit and select Assign to Officer. Search for the officer by name or badge number, confirm the shift date, and save. The assignment is time-stamped and the officer’s name appears as the custodian until the camera is docked and reassigned.
Review Footage and Link to Incidents
Open a camera’s Footage Library and use the date/time filter to locate a clip. Click Link to Incident and search for the corresponding incident report number. Linked footage appears as an attachment inside the incident report for investigators and supervisors.
Export an Evidence Package
Select one or more clips and click Export Evidence Package. Choose whether to include the raw video file, the chain-of-custody audit log, and/or a watermarked copy for external sharing. A downloadable ZIP is generated with a SHA-256 hash for integrity verification.
Apply a Litigation Hold
On any footage record, click Litigation Hold and enter the case reference number and the requesting attorney or internal affairs officer. Held footage is excluded from all automatic deletion routines and will only be released by an administrator after the hold is lifted.
Review Policy Compliance Flags
Go to Compliance Flags to see a list of shifts where an officer’s camera was not activated during a qualifying event (use-of-force, use-of-restraint, or transport). Click each flag to review the timeline, view the officer’s other recordings from that shift, and document the supervisor’s follow-up action.
💡 Pro Tips
- Set up Auto-Link Rules so that any footage recorded within 30 minutes of an incident report creation is automatically linked to that report — reducing the manual work for officers post-shift.
- Use the Bulk Assignment feature at shift briefing to assign cameras to an entire roster at once, rather than assigning each officer individually.
- Configure Low Battery Alerts so the dock station notifies supervisors when a camera drops below 20% charge before a shift ends — preventing footage loss from dead batteries.
- Periodically run the Unassigned Footage report to identify clips that were uploaded from the dock but never linked to an incident or officer record, and resolve before the retention window expires.