
Discharge Documents
The Discharge Documents tab centralizes all paperwork and digital records that must be generated, reviewed, and issued to an inmate at the time of release. From release orders and court commitments to property receipts and supervision conditions, every required document is queued, printed, and archived in one workflow — ensuring your facility meets legal obligations and maintains a complete audit trail for every release.
Document Queue
Automatically populates the required document set based on release type — bond, court order, sentence completion, or administrative.
One-Click Print
Print all required documents in a single batch or select individual forms for targeted reprinting at any facility printer.
Inmate Acknowledgment
Capture inmate signatures on release conditions, property receipts, and notification forms directly within the system.
Permanent Archive
Every generated document is stored in the inmate’s permanent record with a timestamp, officer badge, and document version for compliance audits.
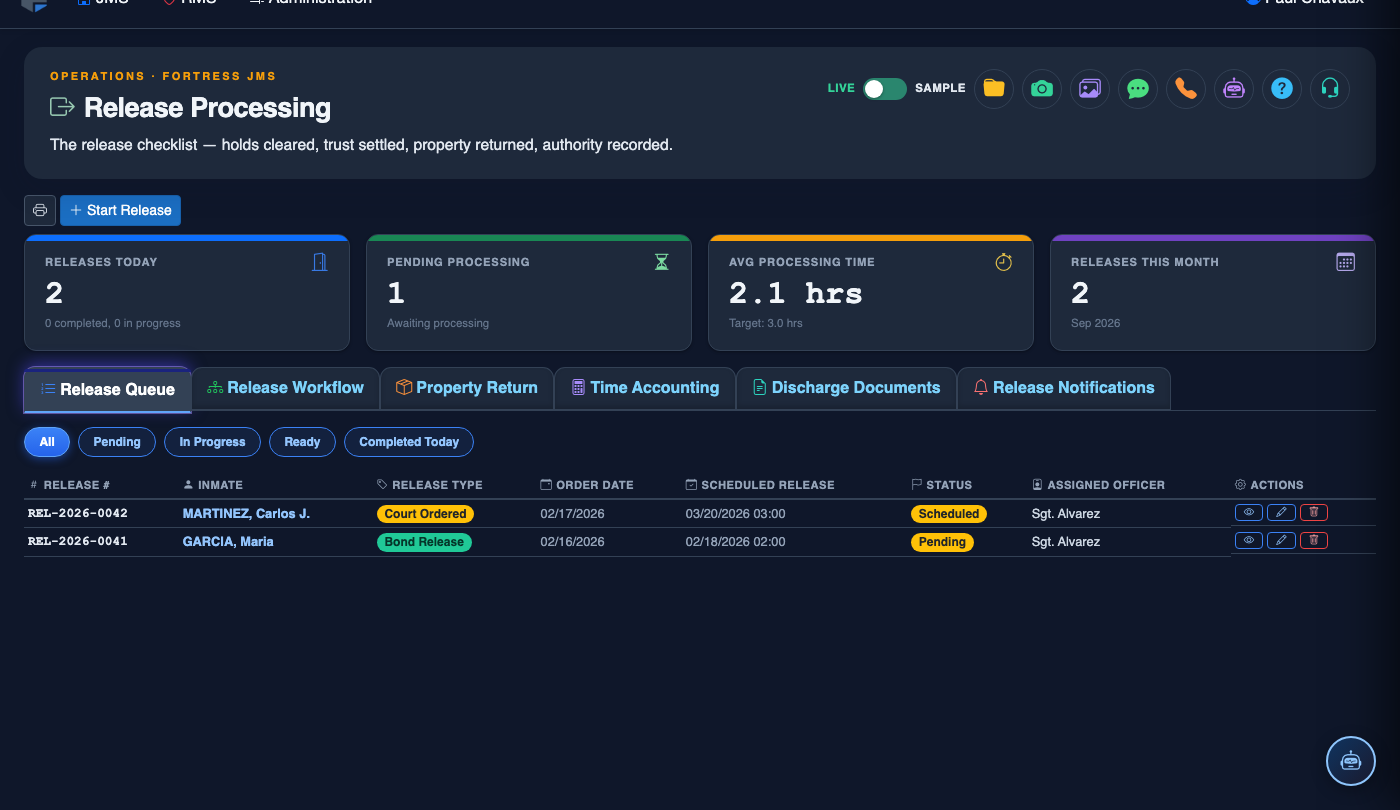
Step-by-Step: Processing Discharge Documents
Open the Release Record
Navigate to Release Processing and locate the inmate scheduled for discharge. Click the inmate’s name or booking number to open the release record, then select the Discharge Documents tab (Tab 5).
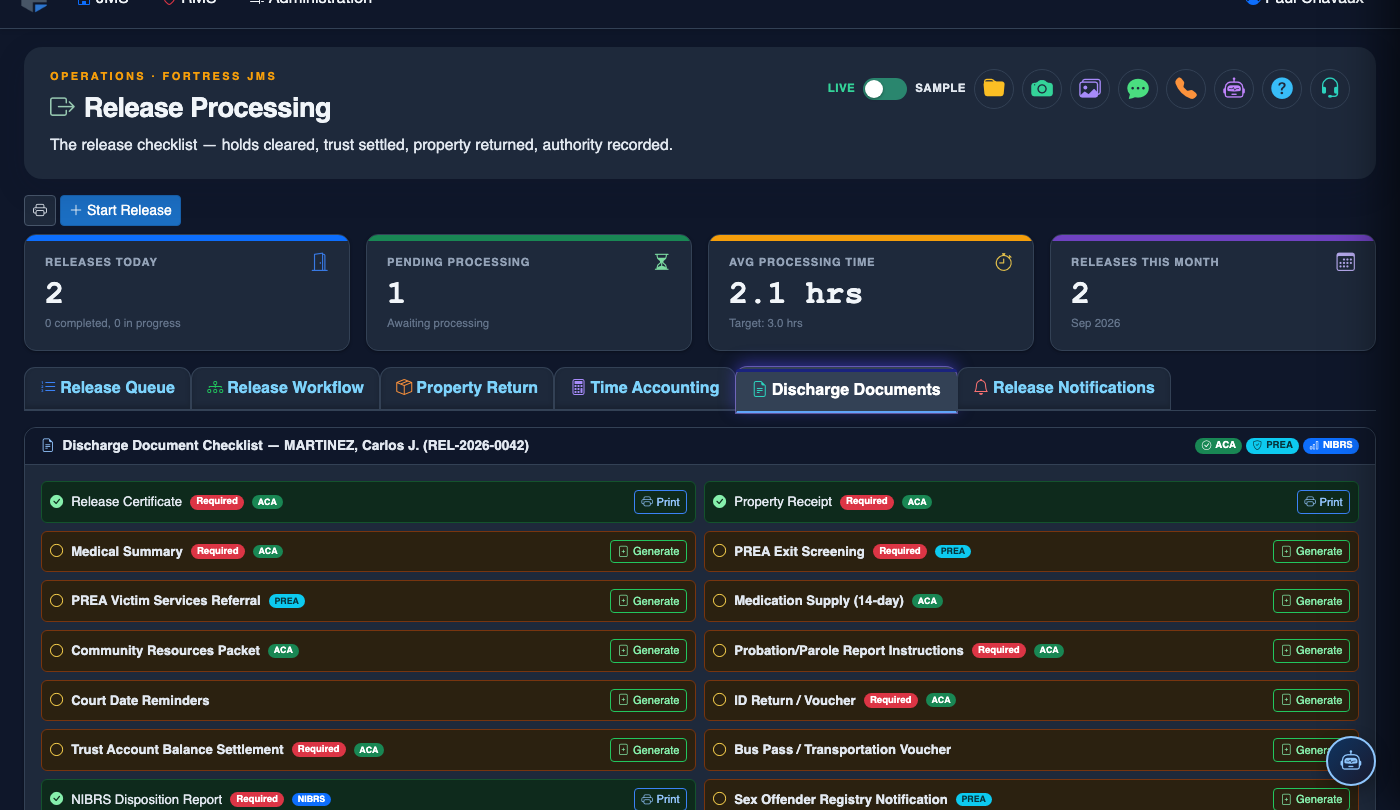
Review the Auto-Generated Document Queue
Fortress JMS automatically determines which documents are required based on the Release Type (bond, court order, sentence completion, or administrative release). Review the list of queued documents. Required items appear with a red Required badge; optional supplemental forms are listed below. Verify that the release reason matches the inmate’s current legal status before proceeding.
Add or Remove Optional Documents
Use the Add Document button to include supplemental forms such as referral letters, diversion program enrollment forms, or medical discharge summaries. To remove an optional document from the print queue, click its Remove link. Required documents cannot be removed without a supervisory override and the system will log the action.
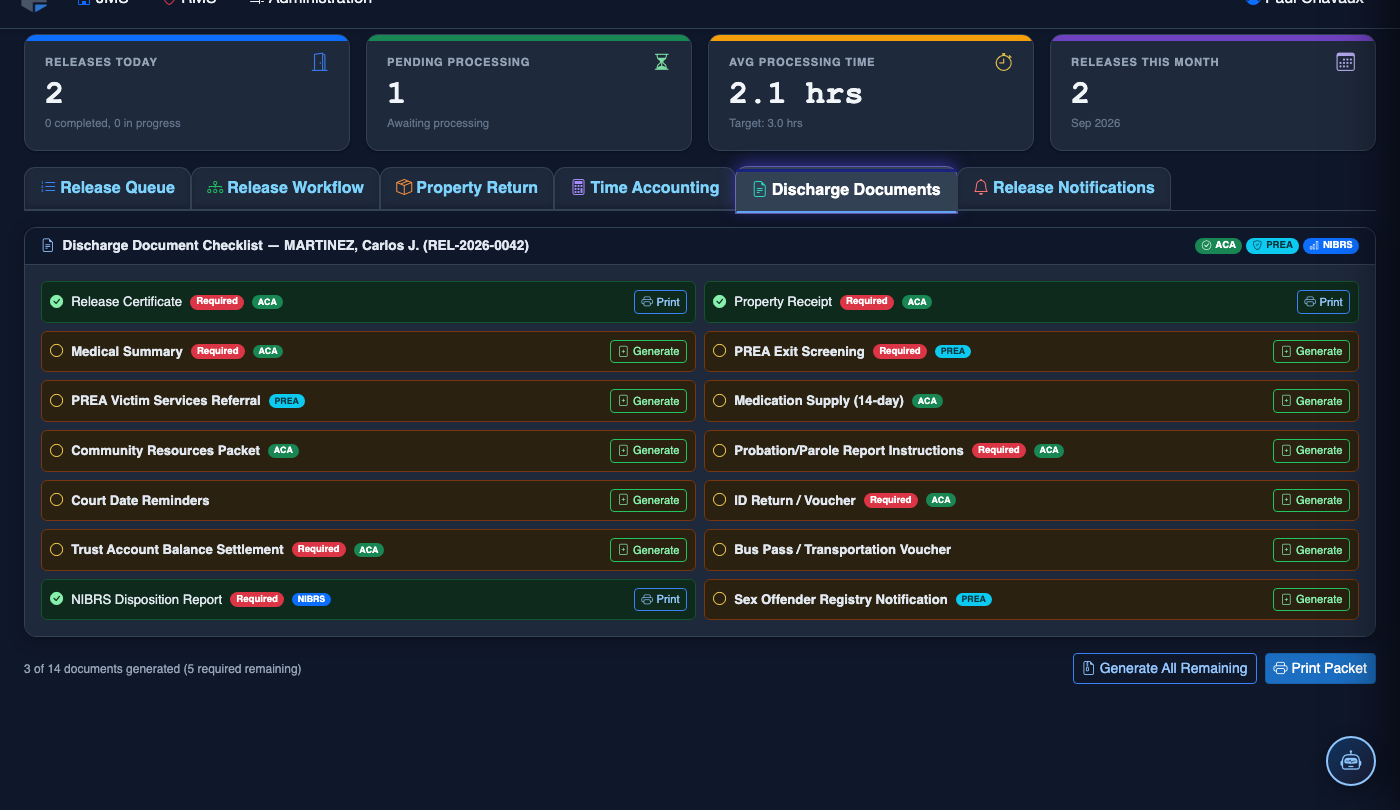
Generate and Print Documents
Click Print All Documents to send the complete packet to the designated release station printer. Alternatively, click the printer icon next to any individual document to print it separately. The system auto-fills inmate details, booking number, release date/time, and the authorizing officer’s name on every form. Confirm the print job completed before calling the inmate to the release window.
Capture Inmate Acknowledgment Signatures
Present the Release Conditions and Property Receipt forms to the inmate for review. Once the inmate has read and understood the document, click Capture Signature next to each form requiring acknowledgment. The inmate signs on the signature pad at the release window; the system embeds the signature with a timestamp and the officer’s badge number.
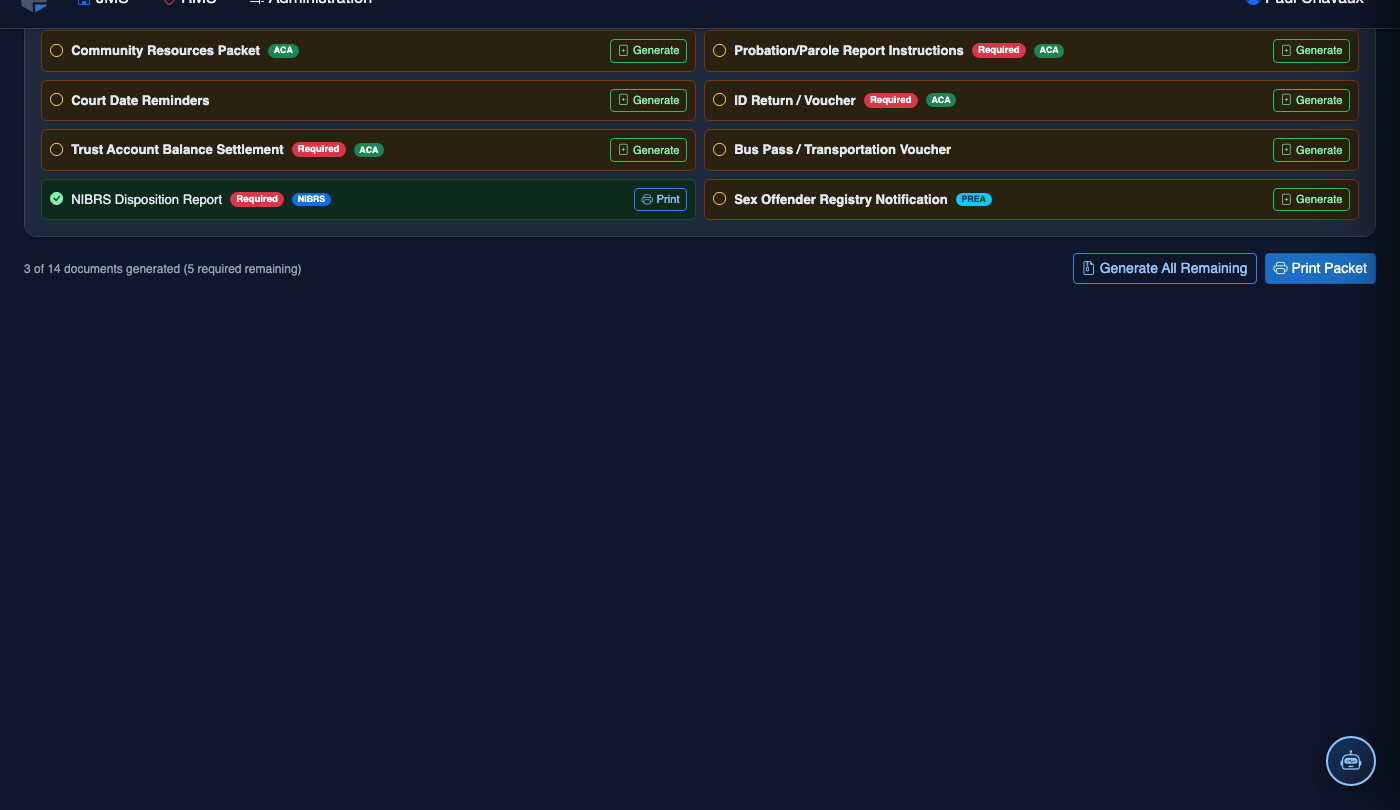
Issue Documents to the Releasee
Hand the inmate their copy of all applicable documents — release order, property receipt, supervision conditions, and any referral paperwork. Click Mark as Issued for each document the inmate has physically received. This updates the document status from Pending to Issued in the release record.
Finalize and Archive
Once all documents are printed, signed, and issued, click Finalize Discharge Documents. The system archives the complete document set to the inmate’s permanent record, closes the document queue, and enables the final release step. A green Documents Complete banner confirms the tab is fully resolved and the release may proceed.
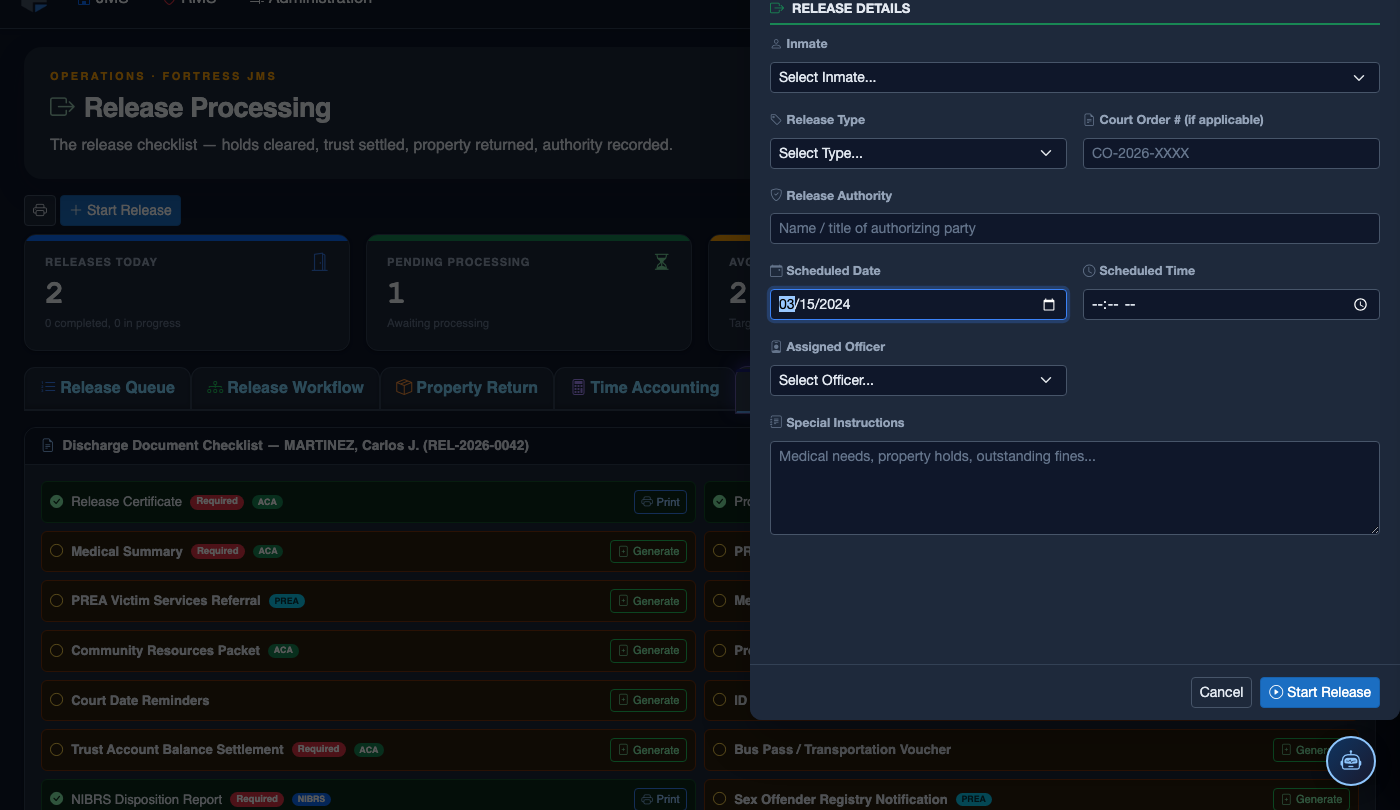
Initiate the Release Process
Click Start Release. Work through the release checklist:
- Inmate — search by name or booking number. Active detainers display as warnings.
- Release Type — Sentence Served, Bond Posted, Court Order, Transfer, or Supervised Release.
- Detainer Check — confirm no holds from other jurisdictions are active before proceeding.
- Property Return — verify all personal property is accounted for and the inmate signs the receipt.
- Release Date and Time — set the official release timestamp.
- Transportation — document how the inmate is leaving (self, family, transport agency).
- Post-Release Notes — conditions of release, supervision reporting requirements, etc.
- Click Finalize Release. Bed status changes to Available; housing and case records are closed.
💡 Pro Tips
- Always verify the Release Type before printing — changing the type after documents are generated requires re-queuing the entire packet and will be logged as a supervisory action.
- If an inmate refuses to sign a required acknowledgment form, use the Refusal to Sign option, which logs the refusal with a witness officer badge number instead of a signature.
- Medical staff can co-sign the medical discharge summary directly from the Medical module — the signature will automatically appear on the document here without requiring a reprint.
- Use the Preview button on any document before printing to catch data errors without wasting paper — especially useful for court-ordered conditions forms that pull from the classification record.
Mobile View — Discharge Documents
FortressDMS is fully responsive. Officers can access the Discharge Documents on a phone or tablet directly from the field — no app install required.
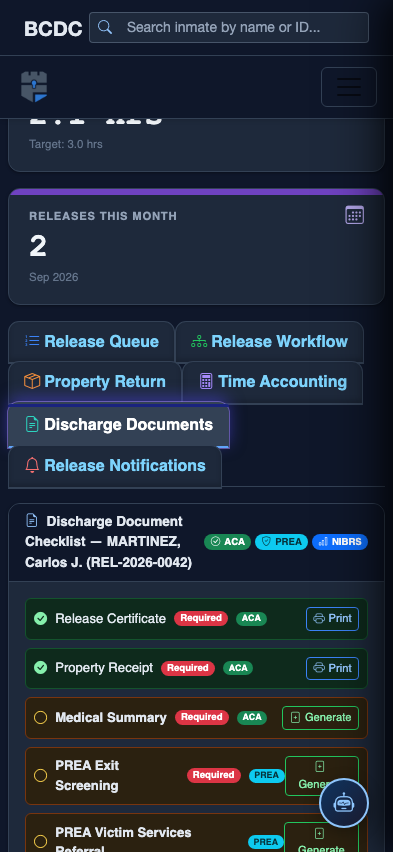
Tab view with data rows
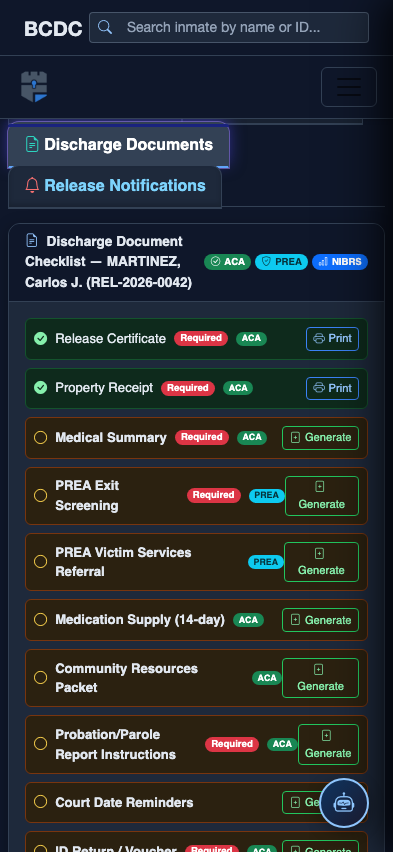
Scrolled / detail view